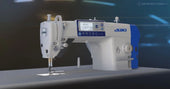
Threading: How to set-up your machine
If you haven’t thread a sewing machine before, we’re here to teach you how. For those that have a thousand times, this will also serve as a timely reminder of how to do it correctly and efficiently every time. It’s surprising how much a simple how-to guide can jog your knowledge and passion for the craft. You will learn how to load an upper and a lower thread into your machine which will be weaved together in order to stitch.
Step one is winding a bobbin:
If you don't already have a pre-wound bobbin, you will need to wind your own from an existing spool of thread. Simply put a spool of thread on the thread pin at the top of your machine. Pass the thread to the left of the machine and wind it counterclockwise onto the pretension disk. Then pass the thread through the two small holes in the empty bobbi, and wind the thread around the centre pillar of the bobbin several times. Next, place the bobbin on the bobbin winder pin, next to the thread spindle. Once you press your pedal the bobbin should start to wind until full. Finally, cut the thread to detach it.
Step two is loading a bobbin:
Now it’s wound, it will enter the bobbin case, a compartment under your needle, to provide bobbin thread while the machine is sewing. Raise the needle and presser foot to their highest position and remove the cover. Place the bobbin in the round slot; there will be an arrow on the machine indicating which direction the drum must be facing for proper unwinding. Finally, thread the end through the machine's tension spring and replace the cover.
Step three is setting the spool and threading:
To install the upper thread for the machine, first, place the spool on the machine's thread pin and pull the thread to the left side of the machine and through the thread guide. From here, pass the thread through the U-shaped thread guide into the deep groove on the front of the machine, and then bring the thread back into the second deep groove on the left. Finally, wind the thread around the metal hook.
Step four is threading the needle:
Thread the eye of the needle from front to back and continue pulling the end of the thread until a few inches of thread is past the needle in order to catch it. You now need to connect the two threads in preparation for sewing. Using the needle position knob or button, lower the needle fully and raise it again. The needle will pick up the lower thread and pull it into the loop. Carefully grab the two threads under the needle and place them away from where you're going to sew.
Now you can start sewing! It’s as simple as that. And for an extra bit of help, get in touch with our team for all your sewing advice and accessories.