11 Embroidery Machine Maintenance Tips to Maximise Uptime
Keeping up with embroidery machine maintenance helps hobbyists and small business owners avoid delays. Many customers ask for reliable performance, so we’ve created easy steps for both home and commercial machines. Doing these daily, weekly, and monthly tasks can prevent stoppages and protect key parts.
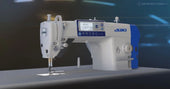
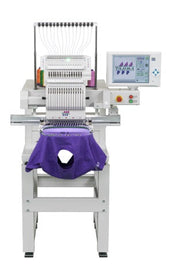
At Sewingtime, we work with Tajima machines across New Zealand and see how regular embroidery machine maintenance leads to cleaner stitches and smoother operation. Some maintenance steps are quick, while others take a little longer. We also offer accessories and spare parts for customers who need reliable tools for bigger projects and long-term embroidery machine maintenance.
Understanding Why Regular Care Matters
Before we cover the daily steps, it helps to know what regular embroidery machine maintenance can stop. Too much lint can block moving parts. Dry parts may get noisy or overheat. Worn needles can break threads, and poor tension affects every stitch. Most problems start small, so early checks make each session easier.
Below are a few of the main reasons a steady embroidery machine maintenance routine makes a difference:
-
It reduces unnecessary downtime across busy work weeks
-
It keeps stitch quality stable from start to finish
-
It protects moving parts against wear
-
It helps you spot issues before they affect a full run
-
It extends the lifespan of key components
These simple habits can help your machine more than you might think. Now, let’s look at the daily embroidery machine maintenance tasks.
Daily Embroidery Machine Maintenance Tasks
Daily tasks are the basics of a good embroidery machine maintenance routine. These steps work for home machines, multi-needle models, and bigger setups with long workdays. Most only take a few minutes and help keep your next job cleaner.
1. Clean Lint and Dust Around the Needle Plate
Lint gathers under the plate, on the feed dogs, and around the stitching area after each run. If lint builds up, the needle might move or the fabric may not sit flat. Uneven stitches often start when small fibers get into tight spots.
A quick clean helps:
-
Prevent skipped stitches
-
Protect the needle bar from unwanted friction
-
Keep the fabric path clear
Use a small brush from your embroidery kit. Gently tap along the plate edge to loosen dust. Avoid using air cans too close to the plate, as strong bursts can push fibers deeper inside and undo your embroidery machine maintenance effort
2. Check the Bobbin Case and Remove Thread Build-Up
Loose threads around the bobbin case can change the tension. If the bobbin isn’t clean, the lower thread might pull too much or too little. This can cause wavy lines, knots under the fabric, or broken thread.
A short daily check supports:
-
Cleaner tension results
-
Better stitch balance
-
Smoother rotation of the bobbin
If you use metal bobbins, check the sides for rough spots. For pre-wound bobbins, make sure the paper sides are still there. Cleaning the bobbin case often is one of the easiest embroidery machine maintenance tasks and helps prevent most problems.
3. Inspect the Needle for Wear
Needles can bend over time. Even a small bend can make gaps in the fabric or cause the thread to fray. Checking the needle every day helps you avoid problems that could stop your work.
Look for:
-
Burrs at the tip
-
A curve when you rotate the needle
-
Thread marks on the needle surface
If you use your machine for long hours, you might need to replace needles more often. Many people change needles after a set number of hours or after each big job. This habit gives your embroidery machine maintenance routine a clear schedule and helps you know when it’s time for a new needle.
4. Wipe the Thread Path and Guides
Thread guides can collect dust, oil, and residue. These small bits can slow down the thread. Over long runs, this might cause loops or uneven finishes.
A soft cloth works well for cleaning. Wipe the guides, the take-up lever area, and the thread stand. Doing this at the start of the day helps the thread move smoothly through the machine.
5. Verify Thread Tension Before Every Job
Different fabrics change how the thread pulls. Even a small change in thickness can affect tension. Before each job, run a quick test stitch. This routine lets you fix common embroidery machine tension problems before you start the main work.
A short tension test:
-
Prevents thread breaks
-
Reduces rework
-
Keeps pattern edges cleaner
Many operators add this simple step to their daily embroidery machine maintenance routine because it saves time on long projects.
Weekly Embroidery Machine Maintenance Tasks

Weekly tasks involve deeper checks that protect your machine’s main parts. These steps help both home machines and multi-head units run well and keep your embroidery machine maintenance plan on track.
6. Oil Moving Parts and the Needle Bar
Tajima machines and many other brands need regular oiling in certain spots. Oil helps lower heat and friction, so moving parts work more easily.
Focus on:
-
The needle bar
-
Rotary hook area
-
Other points listed in your manual
Use only a few drops of oil. A small amount spreads well on metal parts. Many guides explain how to oil an embroidery machine needle bar to prevent friction and heat build-up. We stock machine oil at Sewingtime that matches your model.
7. Inspect the Drive Belt and Pulley
Drive belts control the speed and timing of your machine’s parts. Dust, loose threads, or worn edges can make the belt slip. These slips often start as small noises or slight delays while stitching.
A weekly look helps you check:
-
Belt tension
-
Belt condition
-
Pulley alignment
If the belt feels dry or cracked, replace it before busy times. Adding this to your weekly embroidery machine maintenance schedule keeps your machine running smoothly.
8. Check Hoop Alignment and Clamping Pressure
Hoops can shift over time with regular use. Even a small change affects how the fabric sits. This can distort designs, especially on large patterns.
Check for:
-
Clean hoop arms
-
Stable clamps
-
Even pressure
-
Proper alignment
If you need to know how to check hoop alignment for embroidery, try testing it on scrap fabric first. This step is a useful part of weekly embroidery machine maintenance and confirms everything is straight before you start a big project.
9. Test Machine Sensors and Automatic Thread Cutters
Sensors let the machine detect thread breaks, needle position, and trimming points. If a sensor isn’t working right, the machine might stop or trim at the wrong time.
A weekly test includes:
-
Checking sensor lights
-
Running a small pattern
-
Testing the cutter on short thread samples
Testing sensors as part of your embroidery machine maintenance helps keep production running well, especially on multi-head machines that need accurate signals.
Monthly Maintenance Tasks
Monthly tasks remove deeper build-up and let you check digital settings that affect stitch accuracy.
10. Deep Clean Under the Machine Bed
After a month, dust, fibers, and loose threads build up under the needle plate and around the feed dogs. Removing the needle plate lets you clean these deeper areas.
A full clean supports:
-
Smooth fabric movement
-
Lower risk of jams
-
Longer life for your embroidery machines. Use a brush or a vacuum with a soft nozzle. Move slowly over the feed dog area so you don’t push debris further inside.
11. Review Software and Calibration Settings
Your machine might use software to manage designs, sensor timing, and stitch calibration. Over time, settings can change or new updates may come out.
A monthly review helps:
-
Keep design sizes accurate
-
Maintain clear sensor communication
-
Fix small calibration drifts
Many Tajima machines include built-in calibration steps. If you use external design software, keep it updated as well. This prevents slowdowns when you import new patterns.
Helpful Accessories and Tools That Support Good Maintenance
Many of our clients ask which tools help with maintenance. We suggest simple items that make regular care easier.
Useful accessories include:
-
Small brushes for tight gaps
-
Machine oil designed for embroidery units
-
Replacement needles for different fabrics
-
Spare bobbin cases
-
Extra hoops for large projects
-
Tweezers for thread clearance
We stock accessories that fit Tajima and other popular embroidery machines, making it easier to find the right parts for your needs.
How to Build a Repeatable Embroidery Machine Maintenance Routine
We often see customers get better results when they follow a clear routine. You don’t need complicated steps. Just a simple structure like this:
Daily
-
Remove lint from the plate
-
Clear the bobbin case
-
Check the needle
-
Wipe the thread path
-
Run a short tension test
Weekly
-
Oil moving points
-
Check the drive belt
-
Inspect hoop alignment
-
Test the sensors
Monthly
-
Remove the plate and deep clean
-
Review software and calibration
This simple routine helps keep your machine running well, even when you’re busy.
Common Mistakes to Avoid During Maintenance
Even experienced operators sometimes miss a step. We help customers avoid problems by pointing out small habits that can cause issues.
-
Using too much oil
-
Ignoring loose screws on hoop arms
-
Keeping worn needles for too long
-
Allowing thread to wrap around tension points
-
Skipping test stitches before large jobs
-
Forgetting about software checks
Avoiding these mistakes makes embroidery maintenance simpler and helps keep your results steady.
When to Seek Professional Help
Some problems need a trained technician. We help customers across New Zealand with Tajima and other brands when more serious issues come up.
You may need help if:
-
The machine produces noise that does not go away after cleaning
-
Tension issues continue after rethreading and bobbin removal
-
The needle bar feels loose
-
You see error messages after software updates
-
Patterns shift or warp across every job
A technician can take care of calibration, part replacements, or more detailed mechanical checks.
How Sewingtime Supports Your Equipment Care

We support customers with parts, accessories, guidance, and technical backup across many types of embroidery setups. We work with Tajima machines because of their reliability and long history, and we make sure our selection matches what New Zealand operators need.
Our team can advise on:
-
Needle types
-
Thread choices
-
Hoops and stabilisers
-
Oil and cleaning tools
-
Replacement parts
-
Setup improvements for better output
We also test machines at our Auckland and Christchurch locations to help customers find the right model for reliable work.
Final Thoughts
Regular care helps protect your machine, keeps production steady, and prevents delays during busy times. By following clear steps each day, week, and month, your machine will be easier to manage and more reliable for long projects. We encourage you to make these tasks part of your routine so your machine is always ready for the next design. Take charge of embroidery machine maintenance in a way that supports uptime, protects parts, and keeps each project moving at a steady pace.